相对定位(Relative positioning)
ConstraintLayout是约束布局,是RelativeLayout的升级版。其实RelativeLayout也是通过约束来布局子View的。以前RelativeLayout的约束有两种:
1.子控件和子控件之间的约束,如
1 | android:layout_below="@id/title" |
2.子控件和父控件的约束,如
1 | android:layout_alignParentTop=“true" |
现在ConstraintLayout也是类似的,除了以上两种约束,还多了一种:
3.子控件和Guideline的约束
其实关于和Guideline的约束,也可以理解成约束1,因为Guideline其实就是一个在屏幕上不显示的View。
相对定位的属性和相对布局的很像,值得注意的是参数取值是ID(@id/button1)代表约束1、3,或者字符串”parent”代表约束2:
1 | layout_constraintLeft_toLeftOf |

属性都形如layout_constraintXXX_toYYYOf,constraintXXX里的XXX代表是这个子控件自身的哪条边(Left、Right、Top、Bottom、Baseline),而toYYYOf里的YYY代表的是和约束控件的哪条边发生约束 (取值同样是 Left、Right、Top、Bottom、Baseline)。
当XXX和YYY相反时,表示控件自身的XXX在约束控件的YYY的一侧,例如:
1 | app:layout_constraintLeft_toRightOf=“@id/button1 |
表示的是控件自身的左侧在button1的右侧。
当XXX和YYY相同时,表示控件自身的XXX和约束控件的YYY 的一侧对齐,例如:
1 | app:layout_constraintBottom_toBottomOf=“parent” |
表示控件自身底端和父控件底端对齐。
再来看如下场景:
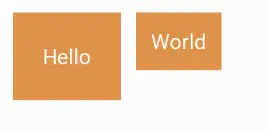
此时想要Hello和World文本中间对齐,ConstraintLayout提供了layout_constraintBaseline_toBaselineOf属性,如下代码:
1 | <TextView |
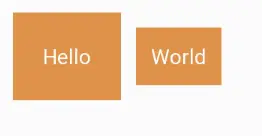
此时界面如下所示:
下面编写一个Feed Item,先看一个简单的新闻列表中常见的feed item。

ConstraintLayout代码如下:
1 | <android.support.constraint.ConstraintLayout xmlns:android="http://schemas.android.com/apk/res/android" |
tv1设置了:
1 | app:layout_constraintLeft_toLeftOf="parent" |
tv2设置了:
1 | app:layout_constraintLeft_toRightOf="@id/tv1" |
tv3设置了:
1 | app:layout_constraintLeft_toRightOf="@id/tv1" |
解读如下:
- tv1应该是在父布局的左上角;
- tv2在tv1的右侧,tv2的右侧和父布局对其,tv2和tv1顶部对齐;
- tv3在tv1的右侧,tv3和tv1底部对其。
Margins
margin和以往的使用一致。
当约束的widget为GONE时的Margins
举例,当A控件约束在B控件的左边,B控件GONE了,此时A会额外拥有一个margin的能力,来“补充”B消失的导致的“位移”。这就是本节的属性。
官方解释如下:
1 | When a position constraint target’s visibility is View.GONE, you can also indicates a different margin value to be used using the following attributes: |
属性如下:
1 | layout_goneMarginStart |
代码如下:
1 | <Button |

当给button4隐藏GONE掉以后:

会发现Button5没有变化,并没有受到Button4消失的影响。
这里我们再仔细看看Button4的android:layout_width=”100dp”,而Button5的android:layout_marginRight=”10dp”,app:layout_goneMarginRight=”110dp”110 = 100 +10。
几个注意事项:
- app:layout_goneMarginRight要配合android:layout_marginRight一起使用。
- 如果只设置了app:layout_goneMarginRight没有设置android:layout_marginRight,则无效。(alpha版本的bug,1.0.1版本已经修复)
- 在约束的布局gone时,控件自身的marginXXX会被goneMarginXXX替换掉,以Demo为例,原本Button4宽度是100,Button5的marginRight是10,加起来是110,如果想让Button4隐藏之后,Button5仍然纹丝不动,则需要设置goneMarginRight为10+100=110。
居中定位和倾向(Centering positioning and bias)
居中定位
约束布局一个有用的地方是它如何处理“不可能”的约束。比如定义如下:
1 | <android.support.constraint.ConstraintLayout |
按照我们第一小节讲的属性值,这个定义的意思是,Button的左边和父控件的左边对齐,Button的右边和父控件的右边对齐。可是控件是wrap_content的,它如果不铺满父控件要如何能满足这两个约束呢?实际效果如下:


控件会居中显示,因为这两个约束作用类似于水平方向上,有相反的力去拉控件,最终控件会居中显示。
倾向(Bias)
搭配bias,能使约束偏向某一边,默认是0.5,有以下属性:
1 | layout_constraintHorizontal_bias (0最左边 1最右边) |
比如上个Demo,加入 app:layout_constraintHorizontal_bias=”0.9”,则会在水平方向上向右偏移至90%。
1 | <android.support.constraint.ConstraintLayout |

对可见性的处理(Visibility behavior)
这一节是对goneMargin的补充。重点是Gone隐藏掉的控件,会被解析成一个点,并忽略margin。
ConstraintLayout能为View.Gone的View特殊处理。
通常,GONE的控件不会被显示,对于布局传递,它们的维度将被视为零(基本上它们将被解析为一个点)。如果它们对其它小部件有约束力,那么他们仍然会受到尊重,但任何margin都将等于零。

为A加上一个android:layout_marginRight=”10dp”,为了使A隐藏后,B仍能纹丝不动,则B的app:layout_goneMarginRight=”120dp”。B goneMarginRight120 = A宽度100 + A marginRight10 + B marginRight10。
margin为负值时的补充
margin设置负值在ConstraintLayout是没有效果的。例如下面布局:TextView B的layout_marginStart和layout_marginTop属性是不会生效的。
1 | <androidx.constraintlayout.widget.ConstraintLayout |
效果如下:

可以通过轻量级的Space来间接实现这种效果,类似如下代码:
1 | <androidx.constraintlayout.widget.ConstraintLayout |
效果如下:

尺寸约束(Dimensions constraints)
ConstraintLayout的最小尺寸 (Minimum dimensions on ConstraintLayout)
可以为ConstraintLayout自身定义最小的尺寸,它会在ConstraintLayout为WRAP_CONTENT时起作用。
1 | android:minWidth |
控件尺寸约束(Widgets dimension constraints)
控件的宽高有三种方式为其设置:
- 确定尺寸
- WRAP_CONTENT
- 0dp,就等于 MATCH_CONSTRAINT
那么MATCH_PARENT哪去了?看官网的解释:
1 | Important: MATCH_PARENT is not supported for widgets contained in a ConstraintLayout, though similar behavior can be defined by using MATCH_CONSTRAINT with the corresponding left/right or top/bottom constraints being set to “parent”. |
在ConstraintLayout中已经不支持MATCH_PARENT这个值了,你可以通过MATCH_CONSTRAINT配合约束实现类似的效果。
写个Demo看一下三种方式设置的效果:
1 | <android.support.constraint.ConstraintLayout xmlns:android="http://schemas.android.com/apk/res/android" |

之前说0dp等于MATCH_CONSTRAINT,那为什么不是撑满屏幕的?MATCH_CONSTRAINT 属性,它match的是约束。
这里第三个按钮的约束是第二个按钮,所以它的宽度设为MATCH_CONSTRAINT时,是和它的约束按钮,即第二个按钮一样宽。注意,此时,竖直方向上没有约束,所以不能使用MATCH_CONSTRAINT属性。
我们将第三个按钮的属性修改为:
1 | app:layout_constraintLeft_toLeftOf="parent" |
则它宽度会撑满屏幕:

再修改Demo,分别为后两个按钮加上margin:
1 | <android.support.constraint.ConstraintLayout |

约束要和0dp的方向一致,否则无效。
比例(Ratio)
只有一个方向约束
可以以比例去定义View的宽高。为了做到这一点,需要将至少一个约束维度设置为0dp(即MATCH_CONSTRAINT)并将属性layout_constraintDimentionRatio设置为给定的比例。例如:
1 | <Button |

比例值有两种取值:
- 浮点值,表示宽度和高度之间的比率 (2,0.5)
- “width:height” 形式的比例 (5:1,1:5)
当约束多于一个(宽高都被约束了)
如果两个维度均设置为MATCH_CONSTRAINT(0dp),也可以使用比例。在这种情况下,系统会使用满足所有约束条件和比率的最大尺寸。
如果需要根据一个维度的尺寸去约束另一个维度的尺寸。则可以在比率值的前面添加W或者H来分别约束宽度或者高度。
1 | <Button |

链条(Chains)
链条在同一个轴上(水平或者垂直)提供一个类似群组的统一表现。另一个轴可以单独控制。
创建链条(Creating a chain)
如果一组小部件通过双向连接(见图,显示最小的链,带有两个小部件),则将其视为链条。

链条头(Chain heads)
链条由在链的第一个元素(链的“头”)上设置的属性控制:

头是水平链最左边的View,或垂直链最顶端的View。
链的margin(Margins in chains)
如果在连接上指定了边距,则将被考虑在内。例如:
1 | <Button |
通过app:layout_constraintRight_toLeftOf=”@+id/buttonB”和app:layout_constraintLeft_toRightOf=”@+id/buttonA”就建立了链条,(我中有你,你中有我)。然后它们两个成了一个整体,所以链条左边设置app:layout_constraintLeft_toLeftOf=”parent”使得和父控件左对齐,右边设置app:layout_constraintRight_toRightOf=”parent”使得和父控件右对齐,这样整个链条就居中了,最后对左控件设置了margin,相当于整个链条左边有了margin。效果:

链条样式(Chain Style)
当在链的第一个元素上设置属性layout_constraintHorizontal_chainStyle或layout_constraintVertical_chainStyle时,链的行为将根据指定的样式(默认为CHAIN_SPREAD)而更改。
看图这里就很像js里的flexible。因为ConstraintLayout就是模仿flexible做的。

加权链(Weighted chains)
和LinearLayout的weight类似。
链的默认行为是在可用空间中平均分配元素。如果一个或多个元素使用MATCH_CONSTRAINT,它们将使用剩余的空白空间(在它们之间相等)。属性layout_constraintHorizontal_weight和layout_constraintVertical_weight将决定这些都设置了MATCH_CONSTRAINT的View如何分配空间。
例如,在包含使用MATCH_CONSTRAINT的两个元素的链上,第一个元素使用权重为2,第二个元素的权重为1,第一个元素占用的空间将是第二个元素的两倍。
下面通过一个例子试验,现在我们希望在底部增加3个tab,均分。实现如下:
1 | <TextView |
增加3个textview来代替tab。3个tab两两设置了约束,最外层设置了parent约束,宽度都设置了match_constraint,这样就完成了3个tab等分。效果图如下:

现在我们给每个tab设置一个属性:app:layout_constraintHorizontal_weight,假设我们分别设置值为“2,1,1”,效果图为:

取其它值,分别显示如下:
spread + 宽度非0

spread_inside + 宽度非0

packed + 宽度非0

Guideline
Guideline只能用于ConstraintLayout中,是一个工具类,不会被显示,仅仅用于辅助布局。它可以是horizontal或者vertical的。(例如:android:orientation=”vertical”)
- vertical 的 Guideline 宽度为零,高度为 ConstraintLayout 的高度
- horizontal 的 Guideline 高度为零,宽度为 ConstraintLayout 的高度
定位Guideline有三种方式:
- 指定距离左侧或顶部的固定距离(layout_constraintGuide_begin)
- 指定距离右侧或底部的固定距离(layout_constraintGuide_end)
- 指定在父控件中的宽度或高度的百分比(layout_constraintGuide_percent)
我们现在在界面右下角增加一个浮动按钮:
1 | <android.support.constraint.ConstraintLayout |
使用TextView表示浮动按钮。设置了固定值,被约束为右下角。正常情况可以通过margin来设置与右侧与底部的距离,这里使用上面提到的两个属性:layout_constraintHorizontal_bias和
layout_constraintVertical_bias,看一下效果图:

下面我们决定通过两根辅助线来定位,一根横向一根纵向,浮点按钮就定位在它们交叉的地方。
1 | <android.support.constraint.ConstraintLayout |
效果图如下:

强制约束(Enforcing constraints)
在 1.1 版本之前,如果将控件的尺寸设置为了WRAP_CONTENT,那么对控件设置约束(如:minWidth等)是不起作用的。那么强制约束(Enforcing constraints)的作用就是,在控件被设置WRAP_CONTENT的情况下,使约束依然生效。
需要使用到的属性有:
1 | app:constrainedWidth="true|false" |
控件设为MATCH_CONSTRAINT时,控件的大小会扩展所有可用空间,在1.1版本后,可以通过以下属性改变控件的行为:
1 | layout_constraintWidth_min 最小宽度 |
下面的例子演示了没有设置强制约束和设置了强制约束的对比:
1 | <ImageView |
运行结果:

百分比尺寸(Percent Dimensions)
说到Percent Dimensions就不得不说ConstraintLayout中的0dp问题,当控件设置为0dp的时候(0dp的称呼又叫match_constraint),默认的行为是撑开(spread),占满可用空间,但是这个行为是可以用layout_constraintWidth_default 属性来设置的。在 ConstraintLayout 1.0.x中,这个属性还可以把它设置为wrap。而到了1.1.x,它又有了一个新的值:percent,允许我们设置控件占据可用空间的百分比。
1 | layout_constrainWidth_percent |
这两个属性的作用就是指定当前控件的宽度或高度是父控件的百分之多少。可设置的值在0-1之间,1就是100%。
下面的TextView控件将占据剩余宽度的50%和剩余高度的50%。
1 | <TextView |
设置头像的宽度占父控件宽度的80%(父控件占满全屏)例子:
1 | <ImageView |

Optimizer
需要知道的是,当我们使用MATCH_CONSTRAINT时,ConstraintLayout将不得不对控件进行2次测量,而测量的操作是昂贵的。而优化器(Optimizer)的作用就是对ConstraintLayout进行优化,对应设置给ConstraintLauyout的属性是:
1 | layout_optimizationLevel |
可设置的值有:
- none:不应用优化。
- standard:仅优化直接约束和屏障约束(默认的)。
- direct:优化直接约束。
- barrier:优化屏障约束。
- chain:优化链约束(实验)。
- dimensions:优化尺寸测量(实验)。
在设置值时,可以设置多个,如:
1 | app:layout_optimizationLevel="direct|barrier|dimensions" |
Barrier
当我们在布局时,有时候就会遇到布局会随着数据的多少而改变大小的情况。以下图为例:

通过上图就可以发现,当在A、B控件的大小都不确定的情况下,View C以谁作为约束对象都不对。如果以A作为约束对象,那么当B的宽度过宽时就会被遮挡,同理以B作为约束也是如此。那么此时,Barrier(屏障)就派上用场了。和GuideLine一样,它是一个虚拟的View,对界面是不可见的。目的就是辅助布局。
对Barrier可以使用的属性有:
- barrierDirection:设置Barrier所创建的位置。可设置的有:bottom、end、left、right、start、top。
- constraint_referenced_ids:设置Barrier引用的控件。可设置多个,设置的方式是:id, id。(无需加 @id/)
- barrierAllowsGoneWidgets:默认为true,即当Barrier引用的控件被GONE掉时,则Barrier默认的创建行为是在已GONE掉控件的已解析位置上进行创建。如果设置为false,则不会将GONE掉的控件考虑在内。
以上图为例,来看看Barrier是如何解决的:
1 | <android.support.constraint.ConstraintLayout xmlns:android="http://schemas.android.com/apk/res/android" |
运行结果:


Group
Group帮助你对一组控件进行设置。最常见的情况是控制一组控件的visibility。只需把控件的id添加到Group,就能同时对里面的所有控件进行操作。其可使用到的属性为:
1 | constraint_referenced_ids:指定所引用控件的 id。 |
例:
1 | <android.support.constraint.Group |
如果有多个Group,是可以同时指定相同的控件的,最终是以XML中最后声明的Group为准。
圆形定位(Circular Positioning)
圆形定位(Circular Positioning)可以让一个控件以另一个控件的中心为中心点,来设置其相对与该中心点的距离和角度。

可以设置的属性有:
1 | layout_constraintCircle:引用另一个控件的 id。 |
view是以各自的中心为参照来约束的,跟通常以start/end/top/bottom或者baseline来约束是不同的。
有了这种约束view的方式,一些平常很难实现的布局和动画实现起来就非常简单了。比如模拟行星的运动,太阳在中心,行星绕着它做旋转。
如果没有ConstraintLayout的这个新功能的话,你可能会用自定义view和在canvas上绘制bitmaps来实现。这样做是可行的,但可能需要做很多工作,而且要让行星与让自定义view外面的其它view交互非常困难。
让我们创建一个示例项目来演示一些利用这个新的约束的技巧。在这个示例中我们将让三个行星绕着太阳转。最终的结果如下:

1 | public class CircleConstraintsActivity extends AppCompatActivity { |
页面布局非常简单:
1 |
|
下面在点击太阳的时候添加一个ConstraintSet的动画。这里我们将显示每个行星的详情。

ContraintLayout和ConstraintSet可以让我们不必担心在点击太阳的时候行星从动画过渡到详情的问题,行星将自然的从当前位置过渡到最终位置。
为此,我们首先在前面的布局文件中添加一些隐藏的TextView,并给每个TextView一个名字,然后在第二个布局文件中显示这些TextView,并把它们的constraints设置为挨着各自的行星。我们还修改了行星的constraints,让它垂直布局。最终的XML如下:
1 |
|
Activity的最终代码
1 | private ConstraintSet orbitsConstraint = new ConstraintSet(); |
设置了Sun图片的点击事件,同时还整理了一下代码,把starting/cancelling动画的方法放在了帮助类中。
Placeholder
Placeholder(占位符)是一个虚拟对象,作用和它的名字一样,就是占位。
当放置好Placeholder后,可以通过setContentId()方法将占位符变为有效的视图。它可以把自己的内容设置为ConstraintLayout内的其它view。如果视图已经存在于屏幕上,那么视图将会从原有位置消失。因此它用来写布局的模版,也可以用来动态修改UI的内容。除此之外,还可以通过setEmptyVisibility()方法设置当视图不存在时占位符的可见性。
用作模版
我们用Placeholder创建一个名为template.xml的模版:
1 |
|
注意我们在这里使用了tools:parentTag=”android.support.constraint.ConstraintLayout”,这样在编辑的时候就会让它按照ConstraintLayout来处理。
每个PlaceHolder都设置了自己的app:content属性,比如app:content=”@+id/edit”,表示用id为edit的控件来填充这个位置。
这个模版在设计视图中是这样的:

模版写好了我们来填充真正的东西。
我们把刚才定义的模版include到真正的布局文件中,并且在这个布局文件中添加真实的控件,注意这里的控件无需添加任何约束,因为它们的位置是由Placeholder决定的。
还有一点就是模版要放在被引用的所有控件之前:
1 |
|
运行结果如下:

以上就是PlaceHolder的使用场景之一模版功能。
动态替换
PlaceHolder还可以在Java代码中动态替换自己的内容:
1 | public class MainActivity extends AppCompatActivity { |
如果结合过渡动画的话,就可以实现一些比较有趣的效果:
1 | public class MainActivity extends AppCompatActivity { |
下面是使用PlaceHolder结合过渡动画实现的效果:

代码详见ConstraintLayoutTest,2.x新版本功能详见ConstraintLayout 2.x详解
参考资料:
鸿洋_ ConstraintLayout 完全解析 快来优化你的布局吧
张旭童 ConstraintLayout 属性详解 和Chain的使用)
Airsaid Android 约束布局(ConstraintLayout)1.1.0 版详解)
泡在网上的日子 Constraint Layout 1.1.x带来了哪些新东西?
Andrew Kelly ConstraintLayout: Circular Positioning
泡在网上的日子 ConstraintLayout: Circular Positioning
新小梦 ConstraintLayout,看完一篇真的就够了么?
