IntentService 详解

概述

       在Android的开发中,凡是遇到耗时的操作尽可能的会交给Service去做,比如上传多张图,上传的过程用户可能将应用置于后台,然后进行别的操作,Activity很可能会被杀死,所以可以考虑将上传操作交给Service去做,如果担心Service被杀,还能通过设置startForeground(int,Notification)方法提升其优先级。

       在Service里不能直接进行耗时操作,一般都需要去开启子线程去做一些事情,自己去管理Service的生命周期以及子线程并非是个优雅的做法,Android给我们提供了一个类,叫做IntentService,注释如下:

1
2
3
4
5
IntentService is a base class for {@link Service}s that handle asynchronous
requests (expressed as {@link Intent}s) on demand. Clients send requests
through {@link android.content.Context#startService(Intent)} calls; the
service is started as needed, handles each Intent in turn using a worker
thread, and stops itself when it runs out of work.

       IntentService是一个基于Service的一个类,用来处理异步的请求。可以通过startService(Intent)来提交请求,该Service会在需要的时候创建,当完成所有的任务以后自己关闭,且请求是在工作线程处理的。使用IntentService最起码有两个好处,一方面不需要自己去new Thread了;另一方面不需要考虑在什么时候关闭该Service了。

IntentService源码解析

       由上可知IntentService是一种特殊的Service,它继承了Service并且它是一个抽象类,因此必须创建它的子类才能使用IntentService。IntentService可用于执行后台耗时的任务,当任务执行后它会自动停止,同时由于IntentService是服务的原因,这导致它的优先级比单纯的线程要高很多,所以IntentService比较适合执行一些高优先级的后台任务,因为它优先级高不容易被系统杀死。在实现上,IntentService封装了HandlerThread和Handler,这一点可以从它的onCreate方法中看出来,如下所示:

1
2
3
4
5
6
7
8
9
10
11
public void onCreate() {
// TODO: It would be nice to have an option to hold a partial wakelock
// during processing, and to have a static startService(Context, Intent)
// method that would launch the service & hand off a wakelock.
super.onCreate();
HandlerThread thread = new HandlerThread("IntentService[" + mName + "]");
thread.start();

mServiceLooper = thread.getLooper();
mServiceHandler = new ServiceHandler(mServiceLooper);
}

       当IntentService被第一次启动时,它的onCreate方法会被调用,onCreate方法会创建一个HandlerThread,然后使用它的Looper来构造一个Handler对象mServiceHandler,这样通过mServiceHandler发送的消息最终都会在HandlerThread中执行,从这个角度来看,IntentService也可以用于执行后台任务。onStartCommand方法如下:

1
2
3
4
5
@Override
public int onStartCommand(Intent intent, int flags, int startId) {
onStart(intent, startId);
return mRedelivery ? START_REDELIVER_INTENT : START_NOT_STICKY;
}

       每次启动IntentService,它的onStartCommand方法就会调用一次,调用onStartCommand的时候,通过mServiceHandler发送一个消息,消息中包含intent。然后在该mServiceHandler的handleMessage中去回调onHandleIntent(intent)。

       IntentService在onStartCommand中处理每个后台任务的Intent,onStartCommand调用了onStart,onStart方法的实现如下所示:

1
2
3
4
5
6
public void onStart(@Nullable Intent intent, int startId) {
Message msg = mServiceHandler.obtainMessage();
msg.arg1 = startId;
msg.obj = intent;
mServiceHandler.sendMessage(msg);
}

       可以看出,IntentService仅仅是通过mServiceHandler发送了一个消息,这个消息会在HandlerThread中被处理。mServiceHandler收到消息后,会将Intent对象传递给onHandleIntent方法去处理。注意这个Intent对象的内容和外界的startService(intent)中的intent的内容是完全一致的,通过这个Intent对象即可解析出外界启动IntentService时所传递的参数,通过这些参数就可以区分具体的后台任务,这样在onHandleIntent方法中就可以对不同的后台任务做处理了。当onHandleIntent方法执行结束后,IntentService会通过stopSelf(int startId)方法来尝试停止服务。这里之所以采用stopSelf(int startId)而不是stopSelf()来停止服务,那是因为stopSelf()会立刻停止服务,而这个时候可能还有其它消息未处理,stopSelf(int startId)则会等待所有的消息都处理完毕后才终止服务。一般来说,stopSelf(int startId)在尝试停止服务之前会判断最近启动服务的次数是否和startId相等,如果相等就立刻停止服务,不相等则不停止服务,这个策略可以从AMS的stopServiceToken方法的实现中找到依据。ServiceHandler的实现如下所示:

1
2
3
4
5
6
7
8
9
10
11
12
13
14
15
16
private final class ServiceHandler extends Handler {
public ServiceHandler(Looper looper) {
super(looper);
}

@Override
public void handleMessage(Message msg) {
onHandleIntent((Intent)msg.obj);
//msg.arg1是个int值,相当于一个请求的唯一标识。
//每发送一个请求,会生成一个唯一的标识,然后将请求放入队列,
//当全部执行完成(最后一个请求也就相当于getLastStartId == startId),
//或者当前发送的标识是最近发出的那一个(getLastStartId == startId),
//则会销毁我们的Service,如果传入的是-1则直接销毁
stopSelf(msg.arg1);
}
}

       IntentService的onHandleIntent方法是一个抽象方法,它需要我们在子类中实现,它的作用是从Intent参数中区分具体的任务并执行这些任务。如果目前只存在一个后台任务,那么onHandleIntent方法执行完这个任务后,stopSelf(int startId)就会直接停止服务;如果目前存在多个后台任务,那么当onHandleIntent方法执行完最后一个任务时,stopSelf(int startId)才会直接停止服务。另外,由于每执行一个后台任务就必须启动一次IntentService,而IntentService内部则通过消息的方式向HandlerThread请求执行任务,Handler中的Looper是顺序处理消息的,这就意味着IntentService也是顺序执行后台任务的,当有多个后台任务同时存在时,这些后台任务会按照外界发起的顺序排队执行。

       当任务完成销毁Service回调onDestory,可以看到在onDestroy中释放了Looper:mServiceLooper.quit()。

1
2
3
4
@Override
public void onDestroy() {
mServiceLooper.quit();
}

IntentService的简单使用

       创建一个IntentService也很简单,只要继承IntentService并覆写onHandlerIntent函数,在该函数中就可以执行耗时操作了。

1
2
3
4
5
6
7
8
9
10
11
public class TheIntentService extends IntentService {

public TheIntentService(String name) {
super(name);
}

@Override
protected void onHandleIntent(Intent intent) {
//在这里执行耗时操作
}
}

       下面通过一个简单示例来进一步说明IntentService的工作方式,首先派生一个IntentService的子类,比如LocalIntentService,它的实现如下所示:

1
2
3
4
5
6
7
8
9
10
11
12
13
14
15
16
17
18
19
20
21
22
public class LocalIntentService extends IntentService {
private static final String TAG = "LocalIntentService";

public LocalIntentService() {
super(TAG);
}

@Override
protected void onHandleIntent(Intent intent) {
String action = intent.getStringExtra("task_action");
Log.i(TAG, "receive task:" + action);
SystemClock.sleep(3000);
if ("com.example.wy521angel.threadtest.TASK1".equals(action))
Log.i(TAG, "handle task:" + action);
}

@Override
public void onDestroy() {
Log.i(TAG, "service destroyed");
super.onDestroy();
}
}

       这里对LocalIntentService的实现做一下简单的说明。在onHandleIntent方法中会从参数中解析出后台任务的标识,即task_action字段所代表的内容,然后根据不同的任务标识来执行具体的后台任务。这里为了简单起见,直接通过SystemClock.sleep(3000)来休眠3000毫秒从而模拟一种耗时的后台任务,另外为了验证IntentService的停止时机,这里在onDestroy中打印了一句日志。LocalIntentService实现完成了以后,就可以在外界请求执行后台任务了,在下面的代码中先后发起了3个后台任务的请求:

1
2
3
4
5
6
7
Intent service = new Intent(MainActivity.this, LocalIntentService.class);
service.putExtra("task_action", "com.example.wy521angel.threadtest.TASK1");
startService(service);
service.putExtra("task_action", "com.example.wy521angel.threadtest.TASK2");
startService(service);
service.putExtra("task_action", "com.example.wy521angel.threadtest.TASK3");
startService(service);

       运行程序,观察日志,如下所示:

1
2
3
4
5
com.example.wy521angel.threadtest D/LocalIntentService: receive task :com.example.wy521angel.threadtest.TASK1
com.example.wy521angel.threadtest D/LocalIntentService: handle task: com.example.wy521angel.threadtest.TASK1
com.example.wy521angel.threadtest D/LocalIntentService: receive task :com.example.wy521angel.threadtest.TASK2
com.example.wy521angel.threadtest D/LocalIntentService: receive task :com.example.wy521angel.threadtest.TASK3
com.example.wy521angel.threadtest D/LocalIntentService: service destroyed.

       从上面的日志可以看出,三个后台任务是排队执行的,它们的执行顺序就是它们发起请求的顺序,即TASK1、TASK2、TASK3。另外一点就是当TASK3执行完毕后,LocalIntentService才真正地停止,从日志中可以看出LocalIntentService执行了onDestroy(),这也意味着服务正在停止。

IntentService模拟多图片上传案例

       下面演示一个多个图片上传的案例,当然我们会模拟上传的耗时,首先看下效果图:

IntentService模拟多个图片上传

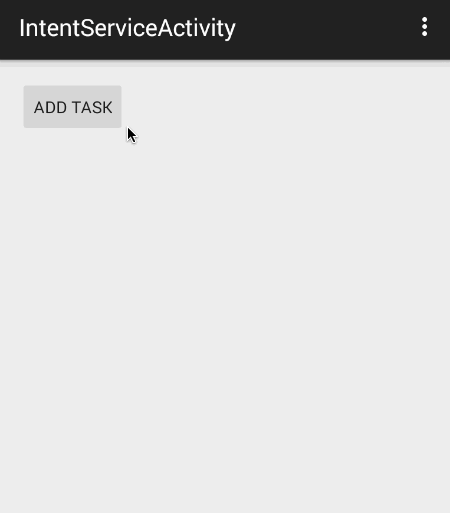
       每当我们点击一次按钮,会将一个任务交给后台的Service去处理,后台的Service每处理完成一个请求就会反馈给Activity,然后Activity去更新UI。当所有的任务完成的时候,后台的Service会退出,不会占据任何内存。

Service

1
2
3
4
5
6
7
8
9
10
11
12
13
14
15
16
17
18
19
20
21
22
23
24
25
26
27
28
29
30
31
32
33
34
35
36
37
38
39
40
41
42
43
44
45
46
47
48
49
50
51
52
53
54
55
56
57
58
59
60
61
62
63
64
65
66
67
68
69
70
71
72
73
package com.zhy.blogcodes.intentservice;

import android.app.IntentService;
import android.content.Context;
import android.content.Intent;
import android.util.Log;

public class UploadImgService extends IntentService
{
private static final String ACTION_UPLOAD_IMG = "com.zhy.blogcodes.intentservice.action.UPLOAD_IMAGE";
public static final String EXTRA_IMG_PATH = "com.zhy.blogcodes.intentservice.extra.IMG_PATH";

public static void startUploadImg(Context context, String path)
{
Intent intent = new Intent(context, UploadImgService.class);
intent.setAction(ACTION_UPLOAD_IMG);
intent.putExtra(EXTRA_IMG_PATH, path);
context.startService(intent);
}


public UploadImgService()
{
super("UploadImgService");
}

@Override
protected void onHandleIntent(Intent intent)
{
if (intent != null)
{
final String action = intent.getAction();
if (ACTION_UPLOAD_IMG.equals(action))
{
final String path = intent.getStringExtra(EXTRA_IMG_PATH);
handleUploadImg(path);
}
}
}

private void handleUploadImg(String path)
{
try
{
//模拟上传耗时
Thread.sleep(3000);

Intent intent = new Intent(IntentServiceActivity.UPLOAD_RESULT);
intent.putExtra(EXTRA_IMG_PATH, path);
sendBroadcast(intent);

} catch (InterruptedException e)
{
e.printStackTrace();
}


}

@Override
public void onCreate()
{
super.onCreate();
Log.e("TAG","onCreate");
}

@Override
public void onDestroy()
{
super.onDestroy();
Log.e("TAG","onDestroy");
}
}

       代码很短,主要就是继承IntentService,然后复写onHandleIntent方法,根据传入的intent来选择具体的操作。startUploadImg是一个辅助方法,避免每次都去构建Intent,startService了。

Activity

1
2
3
4
5
6
7
8
9
10
11
12
13
14
15
16
17
18
19
20
21
22
23
24
25
26
27
28
29
30
31
32
33
34
35
36
37
38
39
40
41
42
43
44
45
46
47
48
49
50
51
52
53
54
55
56
57
58
59
60
61
62
63
64
65
66
67
68
69
70
71
72
73
74
75
76
77
78
79
80
81
82
83
84
85
86
package com.zhy.blogcodes.intentservice;

import android.content.BroadcastReceiver;
import android.content.Context;
import android.content.Intent;
import android.content.IntentFilter;
import android.os.Bundle;
import android.support.v7.app.AppCompatActivity;
import android.view.Menu;
import android.view.MenuItem;
import android.view.View;
import android.widget.LinearLayout;
import android.widget.TextView;

import com.zhy.blogcodes.R;

public class IntentServiceActivity extends AppCompatActivity
{

public static final String UPLOAD_RESULT = "com.zhy.blogcodes.intentservice.UPLOAD_RESULT";

private LinearLayout mLyTaskContainer;

private BroadcastReceiver uploadImgReceiver = new BroadcastReceiver()
{
@Override
public void onReceive(Context context, Intent intent)
{
if (intent.getAction() == UPLOAD_RESULT)
{
String path = intent.getStringExtra(UploadImgService.EXTRA_IMG_PATH);

handleResult(path);

}

}
};

private void handleResult(String path)
{
TextView tv = (TextView) mLyTaskContainer.findViewWithTag(path);
tv.setText(path + " upload success ~~~ ");
}


@Override
protected void onCreate(Bundle savedInstanceState)
{
super.onCreate(savedInstanceState);
setContentView(R.layout.activity_intent_service);

mLyTaskContainer = (LinearLayout) findViewById(R.id.id_ll_taskcontainer);

registerReceiver();
}

private void registerReceiver()
{
IntentFilter filter = new IntentFilter();
filter.addAction(UPLOAD_RESULT);
registerReceiver(uploadImgReceiver, filter);
}

int i = 0;

public void addTask(View view)
{
//模拟路径
String path = "/sdcard/imgs/" + (++i) + ".png";
UploadImgService.startUploadImg(this, path);

TextView tv = new TextView(this);
mLyTaskContainer.addView(tv);
tv.setText(path + " is uploading ...");
tv.setTag(path);
}


@Override
protected void onDestroy()
{
super.onDestroy();
unregisterReceiver(uploadImgReceiver);
}
}

       Activity中,每当我点击一次按钮调用addTask,就回模拟创建一个任务,然后交给IntentService去处理。

布局文件

1
2
3
4
5
6
7
8
9
10
11
12
<LinearLayout android:id="@+id/id_ll_taskcontainer"
xmlns:android="http://schemas.android.com/apk/res/android"
xmlns:tools="http://schemas.android.com/tools"
android:layout_width="match_parent"
android:layout_height="match_parent"
android:orientation="vertical"
>


<Button android:layout_width="wrap_content" android:layout_height="wrap_content"
android:onClick="addTask" android:text="add Task"/>
</LinearLayout>

       这样就完成了效果图的需求,可以使用IntentService可以非常方便的处理后台任务,屏蔽了诸多细节。

       代码详见 IntentServiceTest

参考资料:
《Android 开发艺术探索》任玉刚 第11章 11.2 11.2.4 IntentService
鸿洋_ Android IntentService完全解析 当Service遇到Handler
叶志陈_ Android Service使用详解

Fork me on GitHub